Throw Ins and Building Out the Back
/Basic throw ins getting out; THROWING BACK and switching play
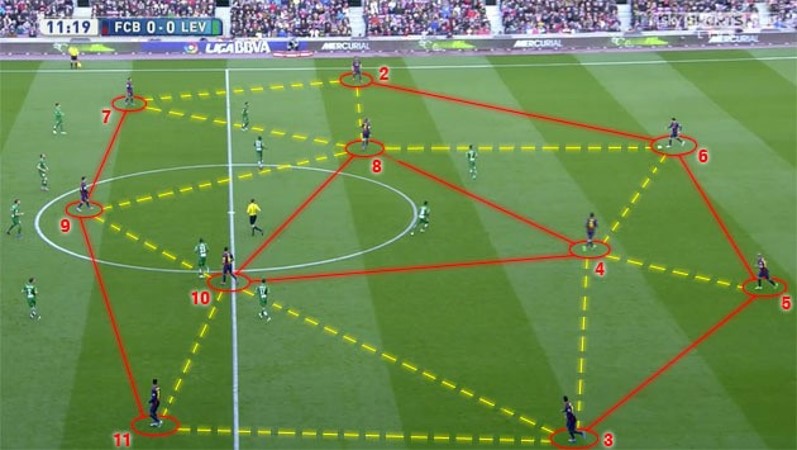
Opponents will be drawn towards the ball at the throw in. We cannot go forward so go back, and switch the point of attack quickly where all the space should be. (6) starts high and very quickly drops off to create space from (A).
Different ways to get out through the back from throw ins
Its all about correct SPACING to open passing channels up. So do not position CLOSED UP. Here we show many options of how to build play forward. Different colors designate different ways to pass out. (10) can CLEAR the space for (8) by taking (H) AWAY.
Basic throw ins getting out; THROWING BACK and switching play
Use the FULL width of the field to open up passing channels but also increase the space to play in per the opponents. (G) may be drawn to mark (7) so this could leave a 1 v 1 for (9) against (D).
THROWING BACK and playing out through the keeper
(F) Stops the pass from (6) to (2) by shutting down the obvious passing lane so we can use the keeper instead. And it may open up the forward pass to (8) also.
Getting out Centrally
(F) Presses (2) quickly expecting (2) to receive the pass, but this may open up a passing lane from the keeper to (8) dropping off into space to receive, as shown here. Keeper must be patient and calm to wait to see what opens up.
THROWING BACK playing wide then centrally
Defensive Midfielder (8) playing the number 6 role must also position to receive in an open passing lane. Players must have the confidence to make these plays.
A more direct pass from (6) to (7) due to opponents positioning
If (F) tries to cut off the pass to (2) then this may open up the passing channel to (7) who must be alert to this.
Building out the back
Immediately (2) and (3) drop off to get free to receive from the keeper. (6) may also be free to receive too. It depends how the opponents position.
Building out the back
(8) And (10) drop in to form a triangular support and move into open passing lanes based on the opponents strikers.
Building out the back though (8)
They push (B) on to go 3 v 3. (6) makes a forward run and takes (B) with them clearing the space for (8) to drop in and receive. (H) may not TRACK (8)’s run.
Building out the back with a wide Rotation
(3) Makes a forward run taking (A) too, clearing the space for (11) drop in free to receive.
Building out the back with a wide Rotation
(3) Makes a forward run taking (A) too, clearing the space for (6) to break wide and free to receive. (8) can drop in to cover (6) plus help (6) play out.
Building out the back: They push 3 up
Now the pass to (2), (3) or (6) is very difficult.
Building out the back
They push 3 up to go 3 v 3 so we cannot play out the back. At least if we have to go long we have our players in front of opponents if the kick is poor by the keeper.
How not to do it
A Bad kick by the keeper to any one of 3 players free outside the box. We must condense to have a chance of regaining the ball. Everyone is out of position so cannot stop (F). Usually happens if the keeper kicks it too soon.
Preferred way to position from the kick
Leave three opponents offside. Condense around (9) the target player to win the second ball quickly. Players must literally SPRINT UP and IN as fast as possible then the keeper kicks it, but not before they are in position.


